Difference between revisions of "Application Development Framework setup on Windows"
From Datonis
m (Tag: Visual edit) |
m (Tag: Visual edit) |
||
| (6 intermediate revisions by the same user not shown) | |||
| Line 34: | Line 34: | ||
** export PATH=$PATH:/c/Ruby23-x64/bin:/c/Program\ Files/nodejs | ** export PATH=$PATH:/c/Ruby23-x64/bin:/c/Program\ Files/nodejs | ||
** alias vi=vim | ** alias vi=vim | ||
| − | * | + | |
| + | [[File:Edit-bashrc-rails.png]] | ||
| + | |||
| + | * Close the shell by typing '''exit''' | ||
| + | |||
== Configure the application framework == | == Configure the application framework == | ||
| + | * Run the msys2 shell | ||
| + | * Navigate to the directory containing the app_framework | ||
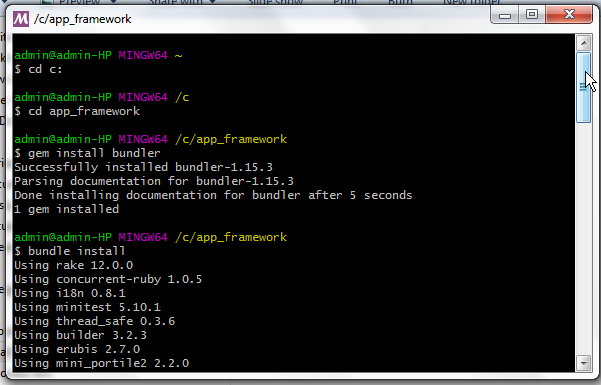
| + | * Run command '''gem install bundler''' | ||
| + | * Next, run the command '''bundle install.''' Note that this will take a while to complete | ||
| + | |||
| + | [[File:Bundle-install2.png]] | ||
| + | * Close the shell by entering '''exit''' | ||
== Starting the development web server == | == Starting the development web server == | ||
| + | * Start windows command prompt | ||
| + | * Navigate to the directory containing the app_framework | ||
| + | * Run '''rake db:seed'''. This will create a default management user | ||
| + | * Run '''rake setup:load'''. This will create default pages within the app | ||
| + | * Next, you can start the server by entering command: '''rails s -p 3001''' | ||
| + | |||
| + | == Configuring the application == | ||
| + | * By default, the system generates an administrator with following credentials: | ||
| + | ** username: admin@appframework.com | ||
| + | ** password: admin123$ | ||
| + | * Open the [http://localhost:3001/admin_login admin page] in web browser and enter the above credentials. Make sure that the login works. Note that it will take a while to start for the first time. Basically a lot of javascript is getting compiled in the backend | ||
| + | * On the Admin dashboard, you can add two types of users | ||
| + | ** Accounts on Datonis - These should be account administrators on several accounts on Datonis. All users on such accounts will be able to login to the application | ||
| + | ** Admin for the local application - These are local application administrators. You can add more users for application administration. | ||
Latest revision as of 11:51, 17 August 2017
Follow the steps in the sequence described below:
Contents
Download and install Mongodb
- Note that you will need a 64 bit Windows machine for this setup.
- Download mongodb installer for Windows Server 2008 R2 64-bit and later, with SSL support x64 from: MongoDB Download Center
- Follow instructions from Mongodb documentation for:
- Downloading and installing the correct version for your platform
- Setting up paths for data and log storage
- Setting up Mongodb as a Windows service
Install Ruby
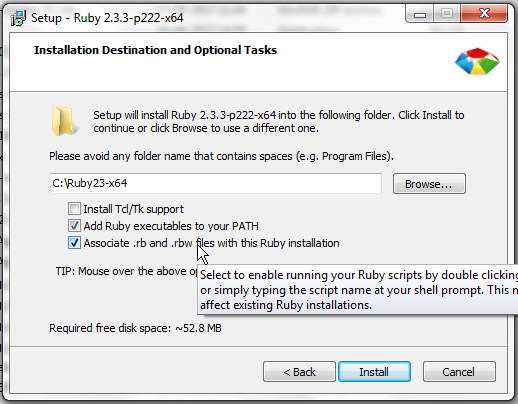
Download and install Ruby version 2.3.3 x64 from https://rubyinstaller.org/downloads/
Make sure you check the options to Add ruby to your system path during the installation. Refer screenshot below
Install nodejs
Download and install latest nodejs version for Windows x64 platform from https://nodejs.org/en/download/
Install and configure development tools
- Install MSYS2 for Windows x64 platform from: http://www.msys2.org/. For example the file name for 64-bit version would be similar to: msys2-x86_64-20161025.exe
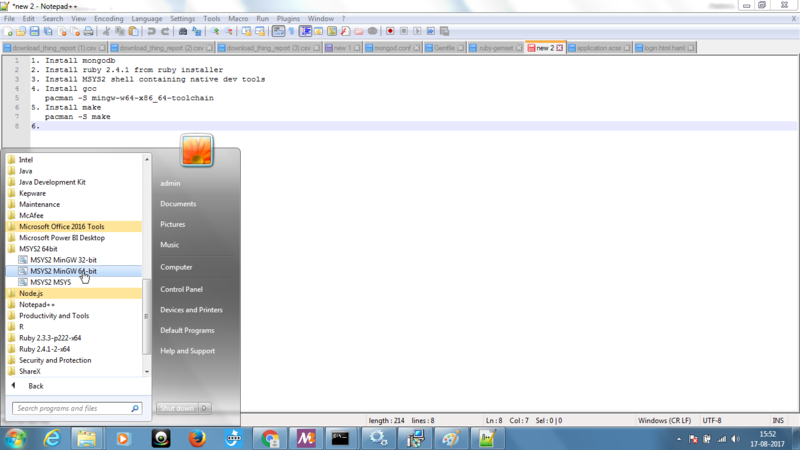
- Run the msys2 shell (by navigating through the Start menu)
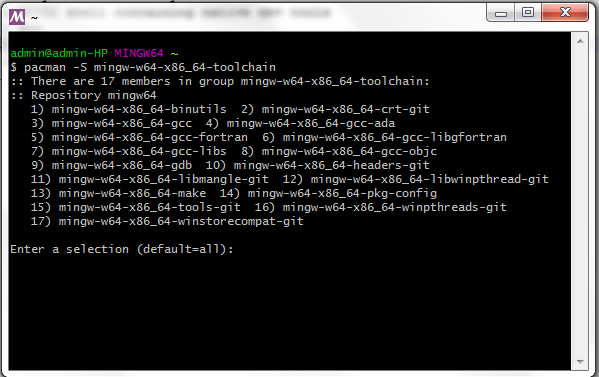
- Install development tools by issuing command pacman -S mingw-w64-x86_64-toolchain. Select all option
- Similarly install make by issuing command pacman -S make
- Also, install vim pacman -S vim
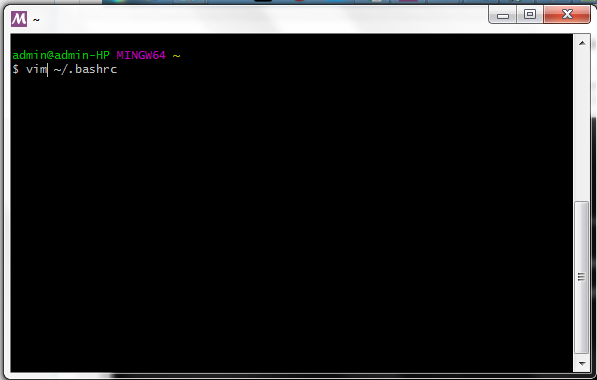
- Open file ~/.bashrc using vim and add the following two lines at the end of the file:
- export PATH=$PATH:/c/Ruby23-x64/bin:/c/Program\ Files/nodejs
- alias vi=vim
- Close the shell by typing exit
Configure the application framework
- Run the msys2 shell
- Navigate to the directory containing the app_framework
- Run command gem install bundler
- Next, run the command bundle install. Note that this will take a while to complete
- Close the shell by entering exit
Starting the development web server
- Start windows command prompt
- Navigate to the directory containing the app_framework
- Run rake db:seed. This will create a default management user
- Run rake setup:load. This will create default pages within the app
- Next, you can start the server by entering command: rails s -p 3001
Configuring the application
- By default, the system generates an administrator with following credentials:
- username: admin@appframework.com
- password: admin123$
- Open the admin page in web browser and enter the above credentials. Make sure that the login works. Note that it will take a while to start for the first time. Basically a lot of javascript is getting compiled in the backend
- On the Admin dashboard, you can add two types of users
- Accounts on Datonis - These should be account administrators on several accounts on Datonis. All users on such accounts will be able to login to the application
- Admin for the local application - These are local application administrators. You can add more users for application administration.
